A friend of mine had me turn some shower curtains into regular curtains and with the remnants I made some toss pillows. Making regular curtains from shower curtains is just so easy that I don't need a whole blog on them... all you do is fold over and sew the part where the eyelets are... tada! you now have a curtain! But pillows... now those can be a little more complicated.
I made several kinds of pillows with the remnants I had so I will start with the easiest. Just a plain old square pillow. You can honestly make any shape of pillow using this method though. You will want to start with 2 pieces of fabric which are the same size and shape. With the "right" sides (the pretty sides) facing eachother pin the pieces together or just sew without the pins. On something this simple I usually don't pin... because I am lazy!
 |
You can see in the upper right hand corner where the pillow is not sewn all the way. Now you are going to stuff the pillow working from the farthest corner towards your open corner. When the pillow is all stuffed you are going to push all the stuffing away from that opening and fold in the unfinished edge and pin the pillow closed (or just hold it closed like I do!) and then sew about 1/8 of an inch from the edge to seal the pillow. You can sew this with your machine (like I do DON'T FORGETH YOUR BACK STICH) or you can do it by hand.
Now how about a ruffled pillow?! There are lots of ways to do this but here's how I like to do it!
First I work with the ruffled edge. I measured out 4 strips of about 4 inches wide and about 17 inches long. But obviously whatever size pillow you are planning on making you will be measuring a little differently. Don't cut the main part of the pillow yet though because you can't be sure how big or small you will need until you do the gathers and measure the inside of the "frame".
I folded each of these strips in half length wise and ironed them. Then I took 2 of these strips and folded both ends in to make a point.
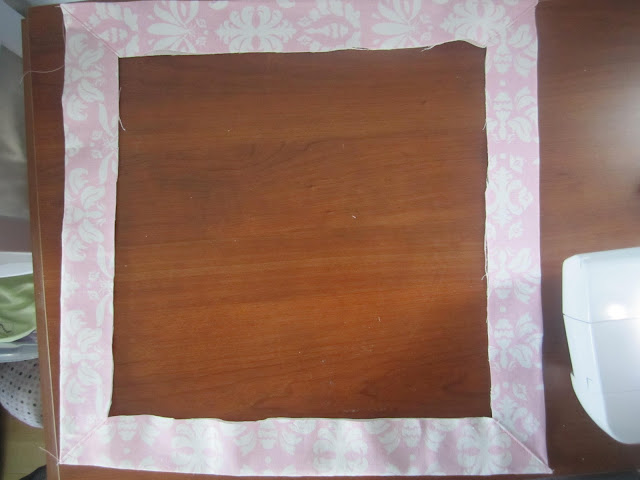
Fold the ends of 2 into points and iron these (be sure to set your iron to an appropriate temperature for your material) Now you are going to make a square... it will kind of be like a picture frame.
Sew each corner together like this. Nothing fancy, just a line from the tip of the point to the middle. DON'T FORGET YOUR BACK STICH!
Now you have this picture frame like square (or whatever shape) of fabric. Now for the gathering to make it ruffled! Please see video on how to ruffle!
After you have gathered your frame you can now measure the size of the inner square. For me with this pillow it was 12 inches. So I cut out two 12 inch squares of fabric. (sorry I didn't take pictures of these but I assume you know what a square looks like) I ironed the edges of these squares under about 1/4 inch (that will be your hem) to give it a finished edge. After your main pillow parts are ironed you can sew them to the ruffle. You can pin if you want or you can just hold them together and sew. Work with one side at a time.
Here you can see that I have one side sewn to the ruffle. Now I will flip this over and sew the other square on. I will sew each side except one and then I will stuff the pillow.
OPTION 2: You can make a pillow sham instead at this point (if you have measured and cut and sewn everything the size of your actual pillow (standard or king size) Just take 2 pieces of fabric that can overlap to cover the back of the pillow. Start by sewing the two ends and then overlap them and sew the sides. Now you have an overlaping pocket opening that you can put a pillow into. OR you could just sew a pillowcase to the back!
I like to leave the pillow still on the machine with the needle down but walking foot up... you can take it off your machine if you want to when you stuff it but I leave it on because that's just one less step for me! After the pillow is stuffed you can finish up that edge.
And tada! You are done. What do you think? Did you make some pillows? I would love to know how they turned out!


No comments:
Post a Comment