Saturday, July 23, 2011

Repairing BumGenius Pockets

Hello Everyone! Today I will be showing you how to repair BumGenius pocket diapers. My friend sent me a dozen diapers that her son wore through potty training and she wants to use for her daughter now. Obviously after 2 years of use the elastic isn't so stretchy and the aplix isn't so sticky. But BumGenius sells these little refresher kits with new aplix and elastic for its users to repair their own diapers. They are only $1 so unless you already have the elastic and aplix on hand you may as well just buy the kit and save the time... you really wont save much money by buying a whole roll of elastic and aplix.


These kits come with 3 pieces of elastic (2 leg gussets, 1 for the back they are all the same length about 4.5in) 2 hook tabs, 2 loop tabs, 2 laundry tabs and instructions. These kits DO NOT come with new aplix for the front of the diaper so if your diaper needs that, these kits wont have everything you need. 

You will also need:
Seam Ripper
sewing machine
safety pins (at least 2)
embroidery floss or all purpose thread and a needle


First remove all the aplix that you will be replacing, using your seam ripper... taking care that you do not rip the PUL or suede cloth. Then you can open the inner seams to get to the elastic.

new elastic on top, old stretched out elastic on the bottom stretched out elastic will allow for leaking of your diapers, hence why we replace the elastic!
The hardest part of these repairs is replacing the elastic but I assure you there is an easy way! After fiddling with wire hangers, safety pins, chopsticks and anything I could get my hands on I found a better way! The directions that come with the kits say to use a safety pin for guiding the new elastic through the elastic channel but 1. this is a huge pain and 2. you could damage the PUL this way.  

Instead, I found that after I exposed the ends of the old elastic by ripping the seams on either end if I just pinned the new elastic to the old elastic I could use the old elastic to pull the new elastic through the channel very easily!
closed seam near the end of leg elastic


open seam, exposing the end of the leg elastic


pin the new elastic to the old elastic on the seam allowance

 After pinning the new elastic to the seam allowance where the old elastic is I stitched the other end of the new elastic to the old elastic using embroidery floss. Nothing fancy here, just a simple double knot to secure the new elastic to the old elastic.

Stitch the end of the new elastic to the old elastic


cut the old elastic between where you pinned and tied the new elastic
After you cut the old elastic you can go to the other side of the elastic channel and pull it through!


After you pull the elastic through to the other side and pin it, you are ready to sew! You can replace the safety pin with a straight pin or you can just hold it securely in your hand. I usually just hold it tightly as I sew. Keep in mind you are only sewing the elastic to the seam allowance, not to the PUL or suede cloth.


After you sew both ends of elastic to the seam allowance you can flip the diaper and close the seam allowance seam (what you opened with the seam ripper when you exposed the elastic)by just stitching over the old seam of the leg gusset.

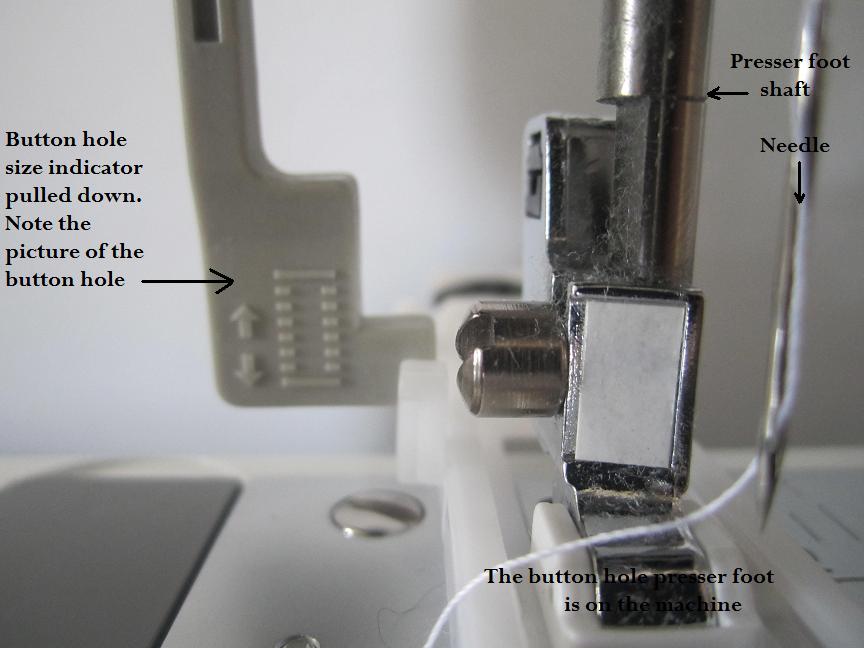
After all the elastic is in (hard part done!) you can sew on the new aplix. This is really simple to do, not much explanation here. Keep in mind the hook part of the hook and loop should be facing inward, loop faces outward. The directions on the refresher kit say to leave the old laundry tab on and sew the new one over it. The new laundry tabs are a bit bigger than the old ones so this is easy to do but if you want to you can remove the old ones anyway... it doesn't matter. Make sure you go over all these seams at least twice.


Once the new hook and loop and elastic is on, you are done! Tada!! For only $1 and maybe 20 minutes (less time once you do it a few times and get in the groove) you have a nice fresh diaper! Here's a picture of a refreshed diaper and a not refreshed. The refreshed diaper is on the left.


I hope reading and watching helped you in some way. Cloth diapers are an investment! We dont spend $20 a diaper to throw them away 2 years later! They really are not hard to repair and refresh. I will be repairing my Flip diaper covers in a couple days so I will blog that also for those of you with Flips!

Thursday, June 23, 2011

Pillowcase Dresses

Let me start by saying, where the hell did the last 2 months go! Sorry I haven't posted in a while, its been crazy here. Baby is mobile now so I am busy busy busy! And I discovered a community garden a few blocks from here so I spend a lot of time in there! Anyway, I hope to get back into the swing of things and keep up with this a little better. Hubby and I just decided that we aren't going to be moving so I have more time and all the projects that I had been putting off because "we are moving who cares!"

So yesterday at the thrift store I picked up this really cute patterned pillow case for 69 cents! Yup... almost half of a dollar! It is a jersey material but you can do these with any material pillowcase. You don't even need a pillowcase to make a dress like these but its easy because it's less sewing. My baby is 8 months (WOW!) and typical standard pillowcases are 21'' by 32'' so I was able to make 2 dresses from the same pillowcase... so 2 dresses 34 cents each! These will seriously only take about 5-10 minutes each. The best part about these is that if you have an unexpected thing you have to go to later that day (I swear my husband is the king of unexpected events so I am always throwing together new shirts and dresses for the baby and I) it takes no time at all and you already have everything you need to make one! Who doesn't have extra pillowcases and ribbon lying around?

OK, so what you need:
Pillowcase
Ribbon
10 minutes

I am going to start with the super easy one. It is adorable and so simple anyone can make it! First cut your pillowcase in half... unless you are making this for a little girl (which you totally can! a standard pillowcase should fit a 5/6 year old! or even be a shirt for an older girl!)
With the bottom portion (the part that has the hem for the opening for the pillow) cut small diagonals off the top (not hemmed part) That is for the sleeves. With the top portion of the pillow (for the other dress) I cut the same little diagonals for the arm holes but I also cut a circle for the neck hole because the top of this part has a seam already.

Now, very simple, working with the bottom part of the pillowcase, turn it inside out and around all the edges put about a 1/2 to 1 inch hem. This is just to finish that area. Then you are going to roll the top and sew another hem but leave the sides (by the diagonal cut) open. Do this for the front and back. Depending on how wide your ribbon is you may want to make this a little wider. Now you simply feed some ribbon from one side of the hem to the other. You can use an unbent wire hanger ("no more wire hangers!" sorry I had to say it, I know you were thinking it!) or a pencil or whatever you have... I used a chopstick today. Just take your ribbon, fold it over the end of whatever you are using and then push the chopstick, wire hanger, pencil, whatever... through the hole to the other side.
Do this to the front and back of the dress and then tie the two bits of ribbon together.


See how easy that was! You are done!! Because we used the bottom half of the pillowcase the bottom of the dress already has a hem. So this is it! How simple was this! A little trouble shooting: if you put this on your little one and you realize (like I did the first time) that the diagonal parts you cut for the arm holes are HUGE all you have to do is roll the top again and do your open ended hem to make it higher... this will make the dress a tad shorter but it will also make the arm holes not seem giant... and then the next time you make one of these you can adjust so you don't need to do the extra step!

Now on to the "complicated" dress... really you can make this one as simple or complicated as you want... you can even make the same exact dress as above if you want! I decided to use the fact that the top had a seam to an advantage so I made a tank dress.

OK so here's how we started... I just hemmed the bottom and around the neck and arm holes. Nothing fancy just a 1/4 in around the arm and neck area and a 1/2 around the bottom. I am not sure on those numbers... I didn't measure. I eyeball everything. ANYWHO, now here's where you get creative! This right here is pretty much done... its a dress, its wearable, everything you do from here on out is just design. So I decided to make the straps a little cuter by adding little strips of excess fabric.

I used the scraps to cut out 4 strips... I need four because I will be using 2 for each strap... you can do just one on each if you want! One at a time I take one of these strips and putting the right sides together (ugly side facing out) and I will sew them into a little circle around the strap. Be careful not to actually sew these to the strap... I like to be able to move them up and down to adjust how wide the sleeve is and if its sewed to the actual dress you wont be able to turn it right side out.


 After you sew each of these guys on there you will trim the excess off and turn them so the pretty side faces out.
See how cute that is! Now, Since this is super baggy and wide I wanted to add ribbon around the belly to give it some shape when my little one was wearing it. Since this is a jersey material and it doesn't fray I decided to be lazy about my belt loops... we will do real belt loops another day! So I just folded the dress in half and made small cuts 2 right next to each other right in line with the straps about 4 inches below the straps.
Then I threaded the ribbon through put the dress on the baby and tied it in a bow. Tada! Done...
Not bad for under 10 minutes (total) and under a dollar! Pillowcases are usually really cheap and plentiful at garage sales and thrift stores and these dresses are too easy and so cute not to make a million of them! I also bought the matching sheet with this pillowcase so in a couple days I will be making myself a shirt or dress or two... Hopefully I can get back into a routine where I can write more again. I have no clue where the last 2 months went but they sure did fly by!

Thursday, April 14, 2011

Button, button, who's got the button!?

Do you know how easy it is to put buttons onto your favorite project? Honestly it is so easy to do buttons that after you figure it out you will be putting buttons on everything... even things that don't need a button! Sewing the actual button is very simple to do by hand (my husband's uniform pops a button nearly every week so I sew a lot of buttons) but the button hole, now that's a different story! Many machines have built in button hole stitches. If you aren't sure if yours does then take a peak at your stitches. Do you see a little rectangle shaped stitch like these?


Yes? OK great! If your machine has these stitch options then you can make a super easy button hole! If your machine has these stitches built into it then it probably came with a button hole foot. Which looks like this!


Put your button hole presser foot on your machine. Now you will have to pull down the button hole size indicator (I don't really know what its called... its been ages since I have looked at my manual but that's just what I call this part since that's the job it does!) It is on the side of the presser foot shaft and it will be in between the 2 plastic parts on the side of the button hole presser foot.


Here is a side view so you can see how the button hole size indicator (the part on your machine that you pull down) determines how large to make the button hole. When you are sewing a button hole the stitching starts out in front (closest to you) and works its way to the back of the button hole.


This is where you will start out. See how the button hole size indicator is closest to the front of the machine between the two plastic parts?


This is the end of the button hole. See how the button hole indicator is at the back, furthest away from you?

Its very simple.
  1. take off the regular presser foot and put on the button hole presser foot
  2. pull down the button hole size indicator
  3. put the button you are working with on the back of the presser foot and press the plastic part to hold it in place
  4. set your machine to the stitch you like.
  5. place your fabric under the presser foot. You want to place the fabric so that the bottom of the button hole will be closest to you. The machine will start there and work its way backwards.
  6. sew the button hole! Just put the presser foot down and hit the gas. You don't have to feed the fabric through or move it around, the machine does it for you.
  7. after the button hole is done take your seam ripper and carefully cut the fabric between the stitches.

See how easy that was? Just in case my written instructions are confusing here is a video!


Now do you see how easy that was?! So how many button holes have you made now? After I learned how to do this I literally made 13 button holes in a day on things that seriously had no need for buttons! It's just too easy!

Tuesday, April 12, 2011

Toss Pillows

A friend of mine had me turn some shower curtains into regular curtains and with the remnants I made some toss pillows. Making regular curtains from shower curtains is just so easy that I don't need a whole blog on them... all you do is fold over and sew the part where the eyelets are... tada! you now have a curtain! But pillows... now those can be a little more complicated.

I made several kinds of pillows with the remnants I had so I will start with the easiest. Just a plain old square pillow. You can honestly make any shape of pillow using this method though. You will want to start with 2 pieces of fabric which are the same size and shape. With the "right" sides (the pretty sides) facing eachother pin the pieces together or just sew without the pins. On something this simple I usually don't pin... because I am lazy!

These two pieces of fabric don't have to be perfect because you are going to turn it right-side out and the uneven parts will be on the inside. Pin this if you want or don't, it doesn't matter! Sew each side leaving about 1/4-1/2 inch seam allowance. Leave a small opening just large enough for your hand to fit inside so that you can turn it right-side out and stuff it.
You can see in the upper right hand corner where the pillow is not sewn all the way. Now you are going to stuff the pillow working from the farthest corner towards your open corner.  When the pillow is all stuffed you are going to push all the stuffing away from that opening and fold in the unfinished edge and pin the pillow closed (or just hold it closed like I do!) and then sew about 1/8 of an inch from the edge to seal the pillow. You can sew this with your machine (like I do DON'T FORGETH YOUR BACK STICH) or you can do it by hand.


Now how about a ruffled pillow?! There are lots of ways to do this but here's how I like to do it!

First I work with the ruffled edge. I measured out 4 strips of about 4 inches wide and about 17 inches long. But obviously whatever size pillow you are planning on making you will be measuring a little differently. Don't cut the main part of the pillow yet though because you can't be sure how big or small you will need until you do the gathers and measure the inside of the "frame".

I folded each of these strips in half length wise and ironed them. Then I took 2 of these strips and folded both ends in to make a point.
Fold the ends of 2 into points and iron these (be sure to set your iron to an appropriate temperature for your material)

Now you are going to make a square... it will kind of be like a picture frame.


Sew each corner together like this. Nothing fancy, just a line from the tip of the point to the middle. DON'T FORGET YOUR BACK STICH!
Now you have this picture frame like square (or whatever shape) of fabric. Now for the gathering to make it ruffled! Please see video on how to ruffle!
After you have gathered your frame you can now measure the size of the inner square. For me with this pillow it was 12 inches. So I cut out two 12 inch squares of fabric. (sorry I didn't take pictures of these but I assume you know what a square looks like) I ironed the edges of these squares under about 1/4 inch (that will be your hem) to give it a finished edge. After your main pillow parts are ironed you can sew them to the ruffle. You can pin if you want or you can just hold them together and sew. Work with one side at a time.
Here you can see that I have one side sewn to the ruffle. Now I will flip this over and sew the other square on. I will sew each side except one and then I will stuff the pillow.

OPTION 2: You can make a pillow sham instead at this point (if you have measured and cut and sewn everything the size of your actual pillow (standard or king size) Just take 2 pieces of fabric that can overlap to cover the back of the pillow. Start by sewing the two ends and then overlap them and sew the sides. Now you have an overlaping pocket opening that you can put a pillow into. OR you could just sew a pillowcase to the back!

I like to leave the pillow still on the machine with the needle down but walking foot up... you can take it off your machine if you want to when you stuff it but I leave it on because that's just one less step for me! After the pillow is stuffed you can finish up that edge.

And tada! You are done. What do you think? Did you make some pillows? I would love to know how they turned out!

Tuesday, April 5, 2011

30 second zero dollar NO SEW nursing tank top

Ok, so you don't have time to sew a new shirt? That doesn't mean you can't make one! "But, Nichole, my sewing machine is in storage!" Well you can still make this!

Start with 2 tank tops (or even 2 shirts if you want) that are made of a no fray jersey or knit material ( so that you wont have to hem anything). I am using these two old A shirts that my husband doesn't wear anymore.
Now I am going to cut holes for nipples in one shirt and cut the bottom of the other shirt off. I am using the darker fabric shirt to layer on top of the lighter fabric because if I was using the lighter color over the darker it would show through.
I cut the holes for the nipple openings small enough so that just the nipple shows but large enough so that I can reach through the hole to unsnap the bra.

And that's it! Walk out the door and move on! You have a new shirt! Put on the shirt with the holes and then put the cumberbun part over those holes! You get extra bonus points if you have a belly band from your pregnancy and don't have to cut up a second shirt! How cool is that! You can also use the same cumberbum you just cut out on other shirts!


Homemade Prefolds!

So I posted this on my old blog but I am reposting (and adding a few things) on here so that all my craft projects are on here. Making prefolds is just too easy!

So first you will want to decide a few things. What material are you using? You can honestly use anything but I like using hemp because it is the most absorbent without needing so many layers! And now you want to decide, How many layers thick do I want my prefold? After you know that you will have to do some math. Who ever said you wouldn't use the math from back in Elementary school was lying! I like my prefolds to be about 12-15 inches wide - so I will have three 4-5inch panels... does that make sense? So you take the amount of layers you want times the number of inches each panel will be (for example If I want a 2-3-2 prefold meaning the two outer panels are 2 layers and the inner one is 3 layers then I will add 2+3+2=7(layers) x 4 (inches per panel) = 28inches needed.) OK, did you figure out the math yet? After you have worked that out you will need to decide how long you want your prefolds to be. I like mine to fit in a cover without needing to fold them down at all so I like about 15in or so. Recently I bought 5 yards of hemp french terry and using the math I just explained I worked out this plan for cutting to maximize the usage of my fabric!
The fabric I have is 60in by 5 yards, I am able to cut this in half so that I have two 30in by 5 yard pieces. 1 yard is 36in 5 yards is 180in/ 15 in (thats how long I want my prefolds to be) = 12 I can make 24 prefolds with this fabric. 
Obviously if you want your prefolds thicker your work up may be different from mine... this is just how I like mine. As a trick though if you still want to use this work up you can still cut like this and then make it a 3-4-3 by adding a 12-15in piece of fabric in after everything is all ironed. Or you could just add a couple 4-5in pieces to the middle panel if you wanted a 2-4-2. You can really customize it however you like.

So to fold a prefold you start by folding about 8-10 inches (depending on how wide you are making each panel) over. If you want that center panel thicker and you have allowed for that in your math earlier (meaning you have 35in wide pieces and not 30in wide pieces like me) you can fold over 4-5 inches first and then fold over the 8-10 inches. After each fold you want to iron a nice hard crease.
Now you are going to fold the other side over 8-10 inches. You will be overlapping the middle part by 4-5inches. Iron all your folds. You will now have a rectangle or square that has 3 panels. Two that are 2 layers thick and one (in the middle) that is 3 layers thick.
One side will be flat and look like all one piece. The other side will have a middle that has been folded over and will look like 2 pieces. Do you want your prefold a little thicker? Then add a square or rectangle that is the same size as the prefold when it is all folded up into the middle of the folded up prefold. No one will know that you didn't do all that extra folding! Now you are going to sew the middle panel in place. Very simple just a a straight line on both sides of the middle panel. You can tuck under that one unfinished edge of the middle panel so it looks nice but if you are using a knit material this is not necessary.


To finish up the edges of your prefold you are going to do a zig-zag stitch just like you did with the bra pads. Set the machine to its waviest setting and when you sew the needle will hit the fabric on one side and no fabric on the other side. This will close up that seam nice and tight.

If you want a layer of "stay dry" feeling for your baby (if you are using these trifolded like I do) then you can simply sew a piece of fleece the same size as the middle panel onto the middle panel.
And here is the finished product. My edges are a little wavy because this material I am working with is SO stretchy and I just cant get the tension perfect. So again, if you want to - for a stay dry feeling or a nice cute look you can add some fleece to the middle. You can even leave the ends open so that you can stuff doublers in there like a pocket prefold!

So what do you think? Still think cloth diapering is too expensive of an investment? It cost me $40 for these 5 yards of fabric and I made 24 diapers... Thats less that $2 per diaper! I would love to see what you did! Did you add the fleece? Or maybe some decorative ribbon? Prefolds are so versatile! You can use them as diapers or you can use them as burp cloths or dusting towels... What else have you used a prefold for?