Saturday, October 26, 2013

Chicken Jacket

OK, so it has been forever since my last post and that is because we bought a farm! So add farm chores to my already long list of things to do and crafting pretty much stops all together! Well, that is not entirely true... instead of making baby clothes and cloth diapers I have been making animal things. Today I am talking about a warm winter coat for our hen "Broody" who was given to us this summer. She lived on a farm with far to many roosters and she was bred so often that her entire back was bare. No feathers. So this summer I made her a thin rooster saddle aka hen apron so when our rooster would breed with her he wouldn't hurt her. It looked like this:


Cute right!? Well my hope was that this would help with her feathers growing back and it did but just not enough... or not fast enough anyway. This is poor broody without her apron:


Kinda tough to tell because her skin is nearly the same color as her feathers but her back is still completely bare. Temps this morning were in the 30's and I just can't let poor Broody out in the cold half naked! So I switched things up a bit and made her a nice thick winter jacket using the same method as the thin apron. So whether you need to make a thick coat or a simple apron for your hen, this pattern will work!

Broody is a full size Buff Orpington hen. If you are working with a bantum you will have different measurements and such. You will want the total length of your jacket to stretch from the base of her neck to about mid-tail. And when measuring for the width (have a helper handy!) lift the wings and measure about an inch or two past each side where the wings will cover. For Broody that was about 8in long and 6in wide. For the straps you will want to measure from under the wing by her chest to the other side of her neck.


The shape we are going for here looks something like a hot air balloon. A somewhat thin part followed by a big round and then your straps. Something like this:


Now, you are going to need 2 of each. I have chosen fleece because it is warm and wicks away wetness. When I did the thinner apron I used a cute quilters fabric and backed it with an ugly but strong canvas so it was both cute but also strong so the rooster's nails and spurs wouldn't bother her. I do have cute colors and patterns for my fleece but I chose this color because it closely matches my bird and winter is coming and the places to hide from hawks are losing their leaves so I didn't want to put a big bulls-eye on Broody.

If your fabric has a right and wrong side you will be facing your right sides together to get started. Then we will turn, top stitch, stuff (if you plan to) add the straps...

Anyway, start with your jacket like this and work your way from one side to the other without closing up the top.


After you have stitched all around, turn through the opening in the top and stuff if you are going to stuff. I lightly stuffed with some down from another bird we processed a while back. Gotta make use of all the parts right! Did you know that 7lbs of feathers in your compost pile = 1lb of nitrogen for your garden once composted! It also makes for super warm stuffing in a chicken jacket!


After you lightly stuff (I am talking one handful of whatever you are using poly-fill, down, wool ect) then fold in the top so that the edge will be uniform with the rest after you top stitch.  Then you will be ready to in your straps and top stitch all around. Depending on your material you will need to add the extra step of hemming your straps. I used fleece which does not require hemming so I did not hem my straps. I did fold them at the base where it connects but I didn't hem because I want them to be nice and wide across Broody's chest to keep her extra warm!

Sidenote: you can also add a little loop of ribbon in between the straps so that your apron/jacket could double as a chicken harness that could be clipped to a leash!
After you have top stitched if you are just making a simple apron then you can jump to adding on your fasteners. Or if you have added stuffing then you can get creative with quilting a bit. I did a simple criss-cross pattern after I spread the stuffing evenly around inside. Then I folded over the ends of my straps and hemmed there so that it would be double layer where I would be adding my snaps.

This is to show how the straps will go. Lay yours out, look at it and make sure you put your snaps on the way you want them!
And now for the snaps! You can use velcro or buttons here if you want instead. I enjoy the durability of snaps and I conveniently have a snap press so that is what I went with. Because these are wide straps I also did double snaps on each side but you can do one snap if your straps are less wide. If you do snaps you will need 4 caps and 2 of each inside pieces for the snaps. If you do double snaps (2 on each strap) then you will need 8 caps, 4 of each inside piece for the snaps.


First you will poke a hole (your snap press should come with a hole poker, if not use a thick yarn needle)


The take your cap and and poke the sharp end through. Decide if you need a male or female inner part for your snap (I did male parts for my straps and female parts for my apron) and line up the inner piece. Then put the cap into the black part of your snap press (be sure you have the right side, or it can make your snap not snap properly). Line things up and squish as hard as you can!


Tada! Now do this to the other strap and then to the apron. You may or may not want to wait til sunset when your bird goes to roost so you can put it on her... or you can just chase her around for a while and hope to catch her! Take your time and lay it on her back, gently lift the wing so it lays over the coat, bring the strap around from the opposite side to they will criss-cross against her chest, snap the snaps and let her fluff herself out! Now your bird is nice and toasty or just has a good cover for when her rooster decides it's baby makin' time!

I snatched Broody up this morning when she walked out of the coop and she was super warm with her new coat on! Now: if your birds already have feathers and you just think they might be cold this winter do not make your bird a coat. Broody got this coat because she has NO feathers. A fully feathered grown hen will grow in extra feathers for winter. Adding a supplemental heat via heat lamp or coat will prevent your bird from growing in that extra layer of feathers and will actually make her colder (if you take the coat off). I ended up making the straps on Broody's coat way too long... long enough to criss-cross in front and then tie in a bow on the back. I will shorten them on a day when it isn't too cold so she isn't without he coat for too long!


Friday, December 21, 2012

Reversable Christmas Stockings

I realize we are only a week away from Christmas but I just this very moment decided we need something Christmas in this house to make it feel like the holidays! We always wait til Christmas Eve for our tree and the tree is usually our only decoration for the holidays. Our oldest baby is 2 now and she is loving the season so I feel like maybe I should start adding more decorations. I remember my mom telling me that she never decorated for Christmas until my sister and I were 6 and 3 and she only did it because we loved it! Anywho, money is tight this time of year so I am using only what I have in the house. Also, because I tend to change my mind a lot and I am always trying to find my own style I have made these reversible so that in 3 years when I decide red is just not going with the rest of our decor I can switch them to the other side and keep the same stockings!

Also, not pictured here is some scrap interfacing I had laying around. If your sweater is really stretchy you may want interfacing so it holds shape!

You can use whatever fabric you want but I wanted to avoid a trip to the fabric store (those are not so easy with 2 babies!) so I am using a couple old fat squares and fleece scraps and an old sweater. Yup... I am turning a sweater into a stocking! The sweater shape and size is my biggest limitation for design of the stockings so I started with that and figured out how big I could make my stockings. Also, I wanted two so I was further limited.


the belly part is the main part of the stocking and the sleeve will be the foot part
 I started by cutting the belly part of the sweater from the shoulders/neck/sleeves. Because I want two stockings I split the belly part down the middle and then I cut the sleeves off at the shoulders.
I made my pattern on newspaper after cutting the sweater
After I cut the sweater and made my newspaper pattern I cut out the fat squares to the pattern. You can either fold your fabric and put the left of the stocking on the fold and cut or cut out 2 separate pieces, no folding required.
I wanted fleece at the top anyway but you can see here that my pattern barely fit on my folded fat square
Nothing too fancy for the fleece top part, just line it up on the patter and cut it about 1/2in too wide for seam allowances!


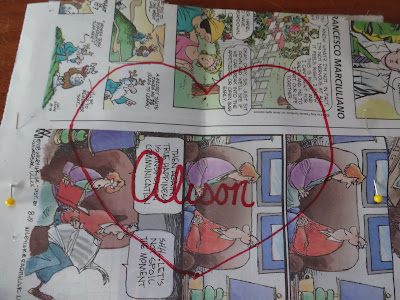
 After I had all the pieces cut out I decided to "embroider" (using my quilters foot) my daughters' names to their stockings. For the green side I just wanted it on the fleece top part and for the red side I cut out little fleece hearts to be sewn in the middle of the stocking later on. If you chose to do the standard glue and glitter (my stocking growing up was that way... still looks good after 25 years!) you don't have to do the names right away but because I embroidered and I didn't want a "wrong" side to show I embroidered before assembling the stockings! 
To quilt/embroider a name (or anything for that matter) I like to use newspaper as a template. The newspaper is especially helpful when using something really stretchy or difficult to freehand on. But if you don't have newspaper or you feel like being brave you can skip the paper! Be sure to practice on some scraps! So first things first, replace your walking foot with the quilters foot and put the guiding teeth down.


say, "hello" to the quilters foot... don't be scared of the quilters foot!
Once your quilters foot is on and you are ready to go, draw on some newspaper whatever you want it to to say or be. I wrote in cursive so I wouldn't need to stop at each letter. But you can just stop and do one letter at a time if you don't want cursive letters. Then pin the newspaper to your fabric. And carefully trace the design! My advice here: set you "cruise control" to medium or high, but move your fabric smoothly and slowly. If you set your cruise control too low it comes out too sloppy.
After you sew you pull the newspaper off... it comes right off! and voila...  here's a video. Don't mind the toddler chatter in the background!


I did a heart with their name for each red stocking and then did the same thing on the fleece strip for the top of the green stocking. Once the names are done you can start assembling the rest of the stockings! The green side is easiest so lets start there. First add the fleece top, put the right sides together and stitch.
see how the name is upside down? flip it right side up and then fold to stitch the sides 
Flip up the fleece part, fold the right sides together and stitch! Then flip right side out!
Now onto the red side... first sew the belly part so its a tube shape do not turn it. Then take the angled end of the sleeve (shoulder)  and put it inside the belly part. Line up the angle with the straight of the belly and pin it. Then sew around the belly and sleeve.
sleeve pinned inside the belly, stitch it around like a sleeve on a shirt

pull the sleeve (now the foot/toe shape) out of the belly part and trim the excess
Then if you need to, add interfacing. I cut out my interfacing using the newspaper template and then sandwiched the sweater into the interfacing and pin. Then you stitch all the way around and turn.
pin... there is a layer of interfacing on each side

stitch around, keep the heel rounded

turn!
 I then hand stitched the hearts with names on them to the red part. Flip the red side back to wrong side out and put it inside the green side. Stitch the red and green side together close to the bottom of the fleece and close to the top of the fleece.
And then because I change my mind all the time... I decided the red side needed a fleece top too... I made a fleece tube and I hand stitched it (going through the red side only) around the bottom and the top going through both the red and green side.

fleece tube for red side top, layer it over the stocking and hand stitch through just the red side
 If you want to you can add the hanging part before stitching the two sides together so the ends are hidden but I wanted to add a little decorative button and put the loop on the outside. I just cut a piece of the sweater (its a knit so I didn't have to hem it or anything, it won't fray) and sewed it on by hand with a cute wooden button.

Here's the red side


And here's the green side
That's it! You can really make them any way you want or with an material you want. I still haven't decided which side I like better.

Saturday, July 23, 2011

Repairing BumGenius Pockets

Hello Everyone! Today I will be showing you how to repair BumGenius pocket diapers. My friend sent me a dozen diapers that her son wore through potty training and she wants to use for her daughter now. Obviously after 2 years of use the elastic isn't so stretchy and the aplix isn't so sticky. But BumGenius sells these little refresher kits with new aplix and elastic for its users to repair their own diapers. They are only $1 so unless you already have the elastic and aplix on hand you may as well just buy the kit and save the time... you really wont save much money by buying a whole roll of elastic and aplix.


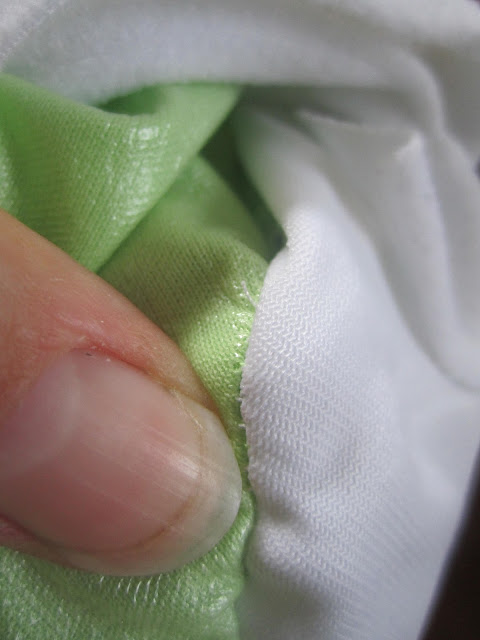
These kits come with 3 pieces of elastic (2 leg gussets, 1 for the back they are all the same length about 4.5in) 2 hook tabs, 2 loop tabs, 2 laundry tabs and instructions. These kits DO NOT come with new aplix for the front of the diaper so if your diaper needs that, these kits wont have everything you need. 

You will also need:
Seam Ripper
sewing machine
safety pins (at least 2)
embroidery floss or all purpose thread and a needle


First remove all the aplix that you will be replacing, using your seam ripper... taking care that you do not rip the PUL or suede cloth. Then you can open the inner seams to get to the elastic.

new elastic on top, old stretched out elastic on the bottom stretched out elastic will allow for leaking of your diapers, hence why we replace the elastic!
The hardest part of these repairs is replacing the elastic but I assure you there is an easy way! After fiddling with wire hangers, safety pins, chopsticks and anything I could get my hands on I found a better way! The directions that come with the kits say to use a safety pin for guiding the new elastic through the elastic channel but 1. this is a huge pain and 2. you could damage the PUL this way.  

Instead, I found that after I exposed the ends of the old elastic by ripping the seams on either end if I just pinned the new elastic to the old elastic I could use the old elastic to pull the new elastic through the channel very easily!
closed seam near the end of leg elastic


open seam, exposing the end of the leg elastic


pin the new elastic to the old elastic on the seam allowance

 After pinning the new elastic to the seam allowance where the old elastic is I stitched the other end of the new elastic to the old elastic using embroidery floss. Nothing fancy here, just a simple double knot to secure the new elastic to the old elastic.

Stitch the end of the new elastic to the old elastic


cut the old elastic between where you pinned and tied the new elastic
After you cut the old elastic you can go to the other side of the elastic channel and pull it through!


After you pull the elastic through to the other side and pin it, you are ready to sew! You can replace the safety pin with a straight pin or you can just hold it securely in your hand. I usually just hold it tightly as I sew. Keep in mind you are only sewing the elastic to the seam allowance, not to the PUL or suede cloth.


After you sew both ends of elastic to the seam allowance you can flip the diaper and close the seam allowance seam (what you opened with the seam ripper when you exposed the elastic)by just stitching over the old seam of the leg gusset.

After all the elastic is in (hard part done!) you can sew on the new aplix. This is really simple to do, not much explanation here. Keep in mind the hook part of the hook and loop should be facing inward, loop faces outward. The directions on the refresher kit say to leave the old laundry tab on and sew the new one over it. The new laundry tabs are a bit bigger than the old ones so this is easy to do but if you want to you can remove the old ones anyway... it doesn't matter. Make sure you go over all these seams at least twice.


Once the new hook and loop and elastic is on, you are done! Tada!! For only $1 and maybe 20 minutes (less time once you do it a few times and get in the groove) you have a nice fresh diaper! Here's a picture of a refreshed diaper and a not refreshed. The refreshed diaper is on the left.


I hope reading and watching helped you in some way. Cloth diapers are an investment! We dont spend $20 a diaper to throw them away 2 years later! They really are not hard to repair and refresh. I will be repairing my Flip diaper covers in a couple days so I will blog that also for those of you with Flips!

Thursday, June 23, 2011

Pillowcase Dresses

Let me start by saying, where the hell did the last 2 months go! Sorry I haven't posted in a while, its been crazy here. Baby is mobile now so I am busy busy busy! And I discovered a community garden a few blocks from here so I spend a lot of time in there! Anyway, I hope to get back into the swing of things and keep up with this a little better. Hubby and I just decided that we aren't going to be moving so I have more time and all the projects that I had been putting off because "we are moving who cares!"

So yesterday at the thrift store I picked up this really cute patterned pillow case for 69 cents! Yup... almost half of a dollar! It is a jersey material but you can do these with any material pillowcase. You don't even need a pillowcase to make a dress like these but its easy because it's less sewing. My baby is 8 months (WOW!) and typical standard pillowcases are 21'' by 32'' so I was able to make 2 dresses from the same pillowcase... so 2 dresses 34 cents each! These will seriously only take about 5-10 minutes each. The best part about these is that if you have an unexpected thing you have to go to later that day (I swear my husband is the king of unexpected events so I am always throwing together new shirts and dresses for the baby and I) it takes no time at all and you already have everything you need to make one! Who doesn't have extra pillowcases and ribbon lying around?

OK, so what you need:
Pillowcase
Ribbon
10 minutes

I am going to start with the super easy one. It is adorable and so simple anyone can make it! First cut your pillowcase in half... unless you are making this for a little girl (which you totally can! a standard pillowcase should fit a 5/6 year old! or even be a shirt for an older girl!)
With the bottom portion (the part that has the hem for the opening for the pillow) cut small diagonals off the top (not hemmed part) That is for the sleeves. With the top portion of the pillow (for the other dress) I cut the same little diagonals for the arm holes but I also cut a circle for the neck hole because the top of this part has a seam already.

Now, very simple, working with the bottom part of the pillowcase, turn it inside out and around all the edges put about a 1/2 to 1 inch hem. This is just to finish that area. Then you are going to roll the top and sew another hem but leave the sides (by the diagonal cut) open. Do this for the front and back. Depending on how wide your ribbon is you may want to make this a little wider. Now you simply feed some ribbon from one side of the hem to the other. You can use an unbent wire hanger ("no more wire hangers!" sorry I had to say it, I know you were thinking it!) or a pencil or whatever you have... I used a chopstick today. Just take your ribbon, fold it over the end of whatever you are using and then push the chopstick, wire hanger, pencil, whatever... through the hole to the other side.
Do this to the front and back of the dress and then tie the two bits of ribbon together.


See how easy that was! You are done!! Because we used the bottom half of the pillowcase the bottom of the dress already has a hem. So this is it! How simple was this! A little trouble shooting: if you put this on your little one and you realize (like I did the first time) that the diagonal parts you cut for the arm holes are HUGE all you have to do is roll the top again and do your open ended hem to make it higher... this will make the dress a tad shorter but it will also make the arm holes not seem giant... and then the next time you make one of these you can adjust so you don't need to do the extra step!

Now on to the "complicated" dress... really you can make this one as simple or complicated as you want... you can even make the same exact dress as above if you want! I decided to use the fact that the top had a seam to an advantage so I made a tank dress.

OK so here's how we started... I just hemmed the bottom and around the neck and arm holes. Nothing fancy just a 1/4 in around the arm and neck area and a 1/2 around the bottom. I am not sure on those numbers... I didn't measure. I eyeball everything. ANYWHO, now here's where you get creative! This right here is pretty much done... its a dress, its wearable, everything you do from here on out is just design. So I decided to make the straps a little cuter by adding little strips of excess fabric.

I used the scraps to cut out 4 strips... I need four because I will be using 2 for each strap... you can do just one on each if you want! One at a time I take one of these strips and putting the right sides together (ugly side facing out) and I will sew them into a little circle around the strap. Be careful not to actually sew these to the strap... I like to be able to move them up and down to adjust how wide the sleeve is and if its sewed to the actual dress you wont be able to turn it right side out.


 After you sew each of these guys on there you will trim the excess off and turn them so the pretty side faces out.
See how cute that is! Now, Since this is super baggy and wide I wanted to add ribbon around the belly to give it some shape when my little one was wearing it. Since this is a jersey material and it doesn't fray I decided to be lazy about my belt loops... we will do real belt loops another day! So I just folded the dress in half and made small cuts 2 right next to each other right in line with the straps about 4 inches below the straps.
Then I threaded the ribbon through put the dress on the baby and tied it in a bow. Tada! Done...
Not bad for under 10 minutes (total) and under a dollar! Pillowcases are usually really cheap and plentiful at garage sales and thrift stores and these dresses are too easy and so cute not to make a million of them! I also bought the matching sheet with this pillowcase so in a couple days I will be making myself a shirt or dress or two... Hopefully I can get back into a routine where I can write more again. I have no clue where the last 2 months went but they sure did fly by!